Object Configuration
- Objects Overview
- Object Settings
- The Impact of the Object Configuration on the Feeder Front end
- Cloning Objects (Full Procedure)
Hint
- The difference of an object and an attribute:
- What kind of data shall be modeled? => object
- Which fields are required to describe the object? => attributes
A typical example would be modeling an employee profile (object) with fields for first name, last name, date of birth etc. (attributes)
Objects Overview
- Clicking the
Object Configurationtile will open a view of all implemented objects - Only system administrators can access this sub-menu and change the data model in Feeder!

- New
- Will open a new input screen.
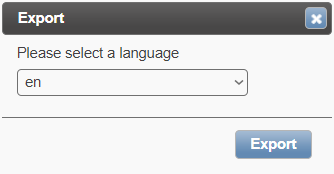
- Export
- Will output a json-file.
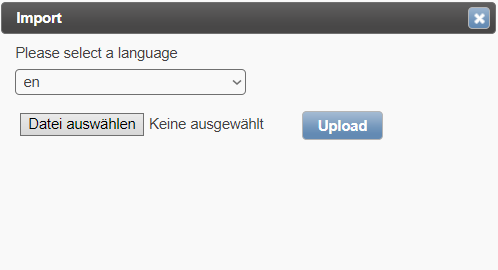
- Import
- Requires a json-file. Please be careful, Feeder does not allow delta imports here!
Identifying the object ID
The export and import functionalities are relevant in case that a data object shall be cloned. Therefore, it is also important to detect and work with the object ID.
You may find the object ID in the objects.json file. A json-file with 1 object only, looks like this:

Alternatively you may find the object’s internal ID when opening the object’s tile on the workspace and taking a look at the URL:

Creating a new object
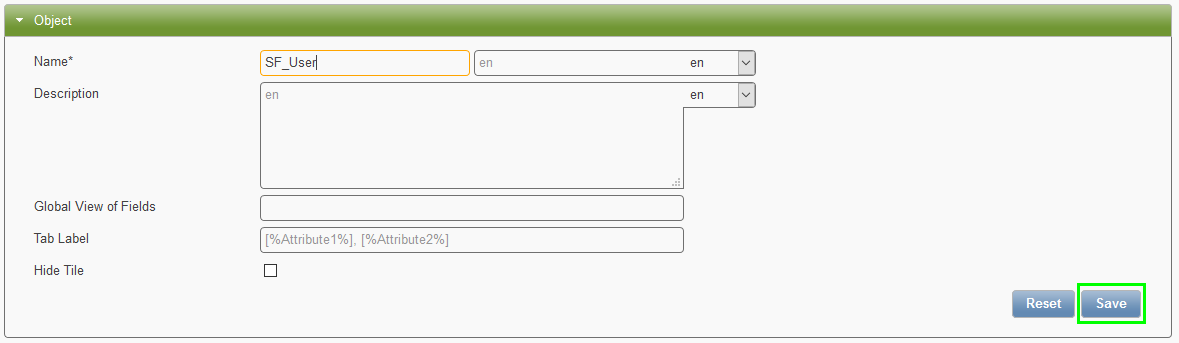
The following screenshots demonstrate the first steps of creating a new object named “SF_User”.
- Steps
- Fill in a name and labels
- Click
Save- this will open more options - Upload images that will be shown on the Feeder workspace (optional)
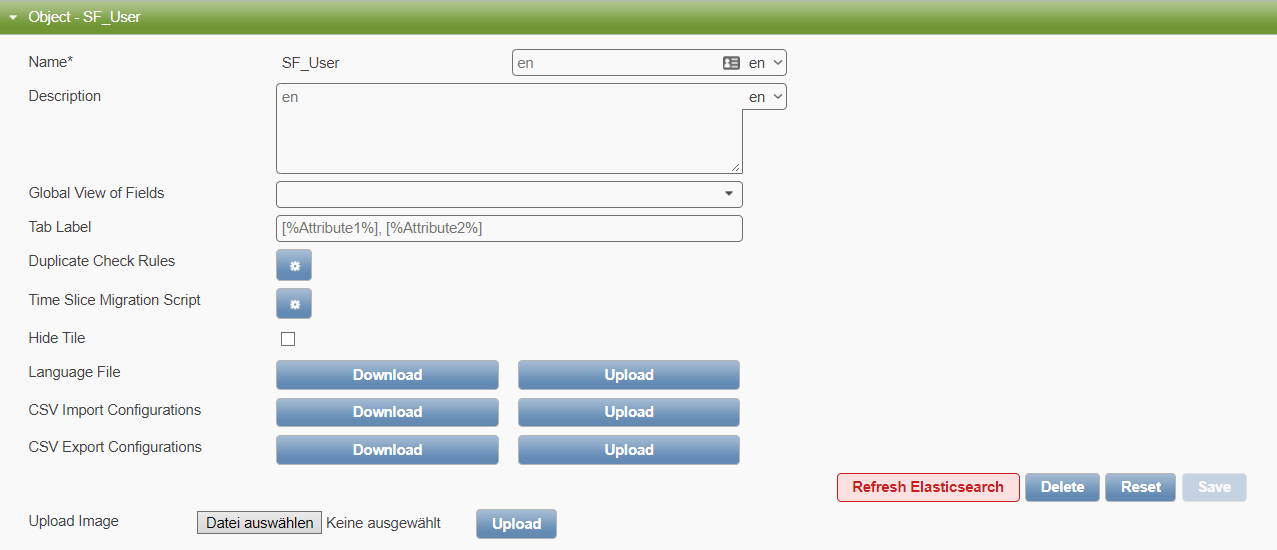
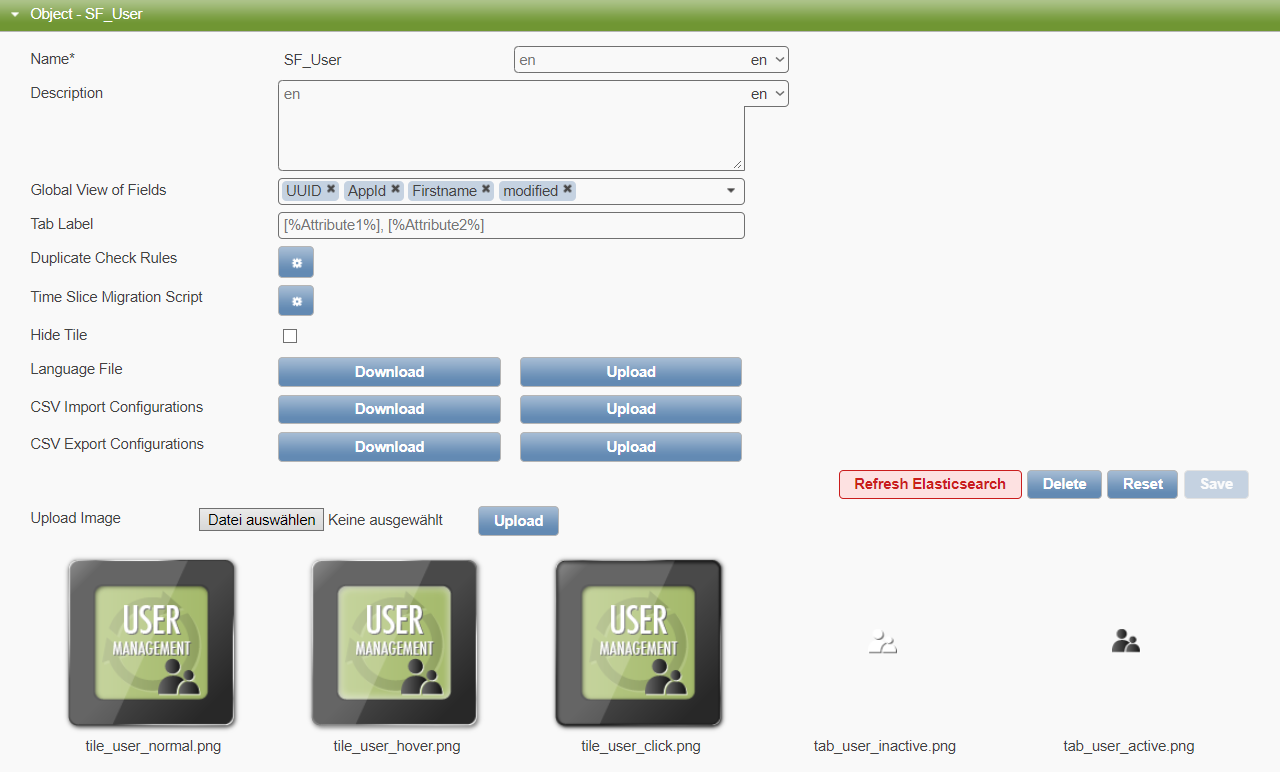
- Steps (continued)
- Create at least 1 attribute (field)
- Add this field to the Global View of Fields section (!)

Hint
Clicking the green bar will close the object settings and thus require less scrolling effort.
Object Settings
- Name
- Set a system field name (after saving it cannot be changed anymore)
- Translate the system field name in the input box to the right (label)
- Please watch the language that you are translating to (en, de, etc.)!
- E.g. “SF_User” could be displayed in the browser as “SuccessFactors User”
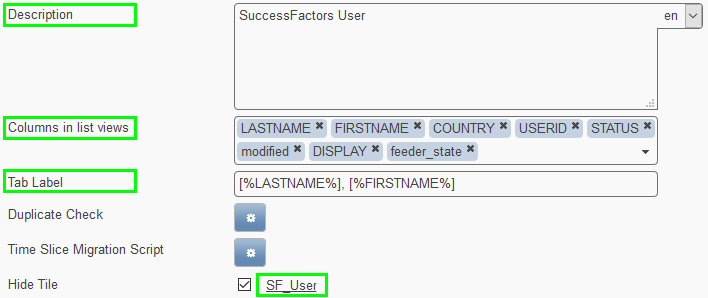
- Description
- The text shows in the objects overview and
- When hovering over the object tile on the workspace
- Columns in list view (Global View of Fields)
- Specify what fields are to be shown when opening an object (tile)
- These can be searched by using the regular search box
- Tab Label
- Show these fields when opening a data record in the front end
- E.g. [%LASTNAME%],[%FIRSTNAME%]
- will display object label - last name, first name
- Duplicate Check
- Helps to identify potential duplicates
- Please read more here: Duplicate Check
- Time Slice Migration Script
- Please read more here Rule-based Value Changes In Future Time Slice
- Hide Tile
- When enabled, the tile is hidden from the Pentos Feeder workspace
Language File
Download
Returns a json-file of one language with all translations (objects / attributes / choices)
Upload
Upload a json-file of one language with all translations (objects / attributes / choices)
CSV Import/Export Configurations
Important
As of Feeder v2.3 , you may download or upload Import and Export Configurations via CSV. If you want to copy your settings from one to another Feeder instance, this might be a convenient way to do so.
Download
Returns a csv-file of your import/export settings
Upload
Upload a csv-file of your import/export settings
- Upload Image
Upload a visual representation (image) of the data object on the Pentos Feeder workspace.
The file names need to adhere to the following naming conventions:
- tile_ CUSTOM _normal.png
- tile_ CUSTOM _clicked.png
- tile_ CUSTOM _hover.png
For example:
- tile_ employees _normal.png
- tile_ employees _clicked.png
- tile_ employees _hover.png
When to click the Refresh Elasticsearch button..
Important
When to click the Refresh Elasticsearch (Rebuild Index) button (v2):
- Creating a new object otherwise you cannot open the tile and access the data
- Creating a new attribute otherwise the search results are not 100% correct
- Deleting an attribute
- Enabling/ disabling the Full-Text Search flag
- Changing the data type of a field
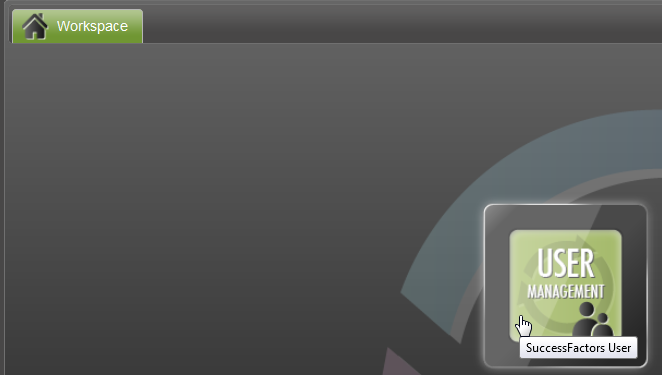
The Impact of the Object Configuration on the Feeder Front end
The following screenshot shows the relevant object settings. Further down you will find the effects on the frontend.
Hovering the mouse pointer over a tile will display the object description.
Clicking on the tile will open the (data) standard view with the given order of the attributes (column headers).

When opening a record, the specified attributes are displayed as tab labels. In the given example you will find the object’s label as well as the lastname and firstname of the SF User record:

Cloning Objects (Full Procedure)
Cloning to another Feeder instance
- Export the objects (objecttypes.json)
- Export the attributes (attributes.json)
- Export attribute choices (attributechoices.csv)
- Import the objects into the new Feeder system
- Import the attributes
- Import the attribute choices
Cloning within the same Feeder instance
Alter the job from above:
- In objecttypes.json:
- remove unwanted objects
- remove the object’s internal ID
- Feeder will auto-generate a new object ID at import
- Alternatively, create a new object
- Find out and save the new object ID to the clip board
- In attributes.json:
- replace the old object ID with the new object ID
- repeat the last step for every attribute so that it is assigned to the new object
- For all attributes change their internal IDs too e.g. by changing the last character!
- Then save the modified file
- In the Object Configuration, open the new object
- Import the attributes.json
- Import the attributechoices.csv file (optional)
Important
Please be very careful and do not confuse the object ID with the attribute IDs!